

How To Set Up New Xbox Account
The Xbox One X has finally been released, which means that the era of native 4K gaming on a panel is well and truly upon us.
By now you've hopefully read our definitive Xbox 1 Ten review, and checked out our guide to the all-time Xbox One X enhanced games, and you might have purchased one of the consoles for yourself.
If you have, or you're planning to, and so nosotros've got a whole heap of communication to aid you lot set up up the new panel as quickly and easily equally possible.
Setting up the Xbox One X is actually no more complicated than any other console, but there are a couple of time-saving hacks you can use to go yourself up and running as rapidly as possible.
Improve still, you lot can actually start the preparation before your new panel arrives (if you're transitioning from a previous Xbox Ane), saving yourself even more than time downwardly the line. If this is your first Xbox One, and so feel complimentary to skip ahead to Pace 2c since you won't have whatsoever prior data to transfer over.
Permit'south go started.
Stride 1: Pre-download your Xbox I 10 patches to your existing Xbox One
If you're moving from an old Xbox One or Xbox Ane South, so you tin pre-download a lot of the patches that the Xbox I Ten is going to need later.
Past default the previous consoles won't download all the fancy 4K assets and textures that the new console will utilise considering these take upward space and don't practice anything on the sometime hardware.
Just if you desire to get ahead of the curve and salvage yourself having to download them later on then you can choose to download them onto your existing console ahead of time.
Here'south how yous practice information technology:
- Printing the key Xbox push button to open the sidebar menu
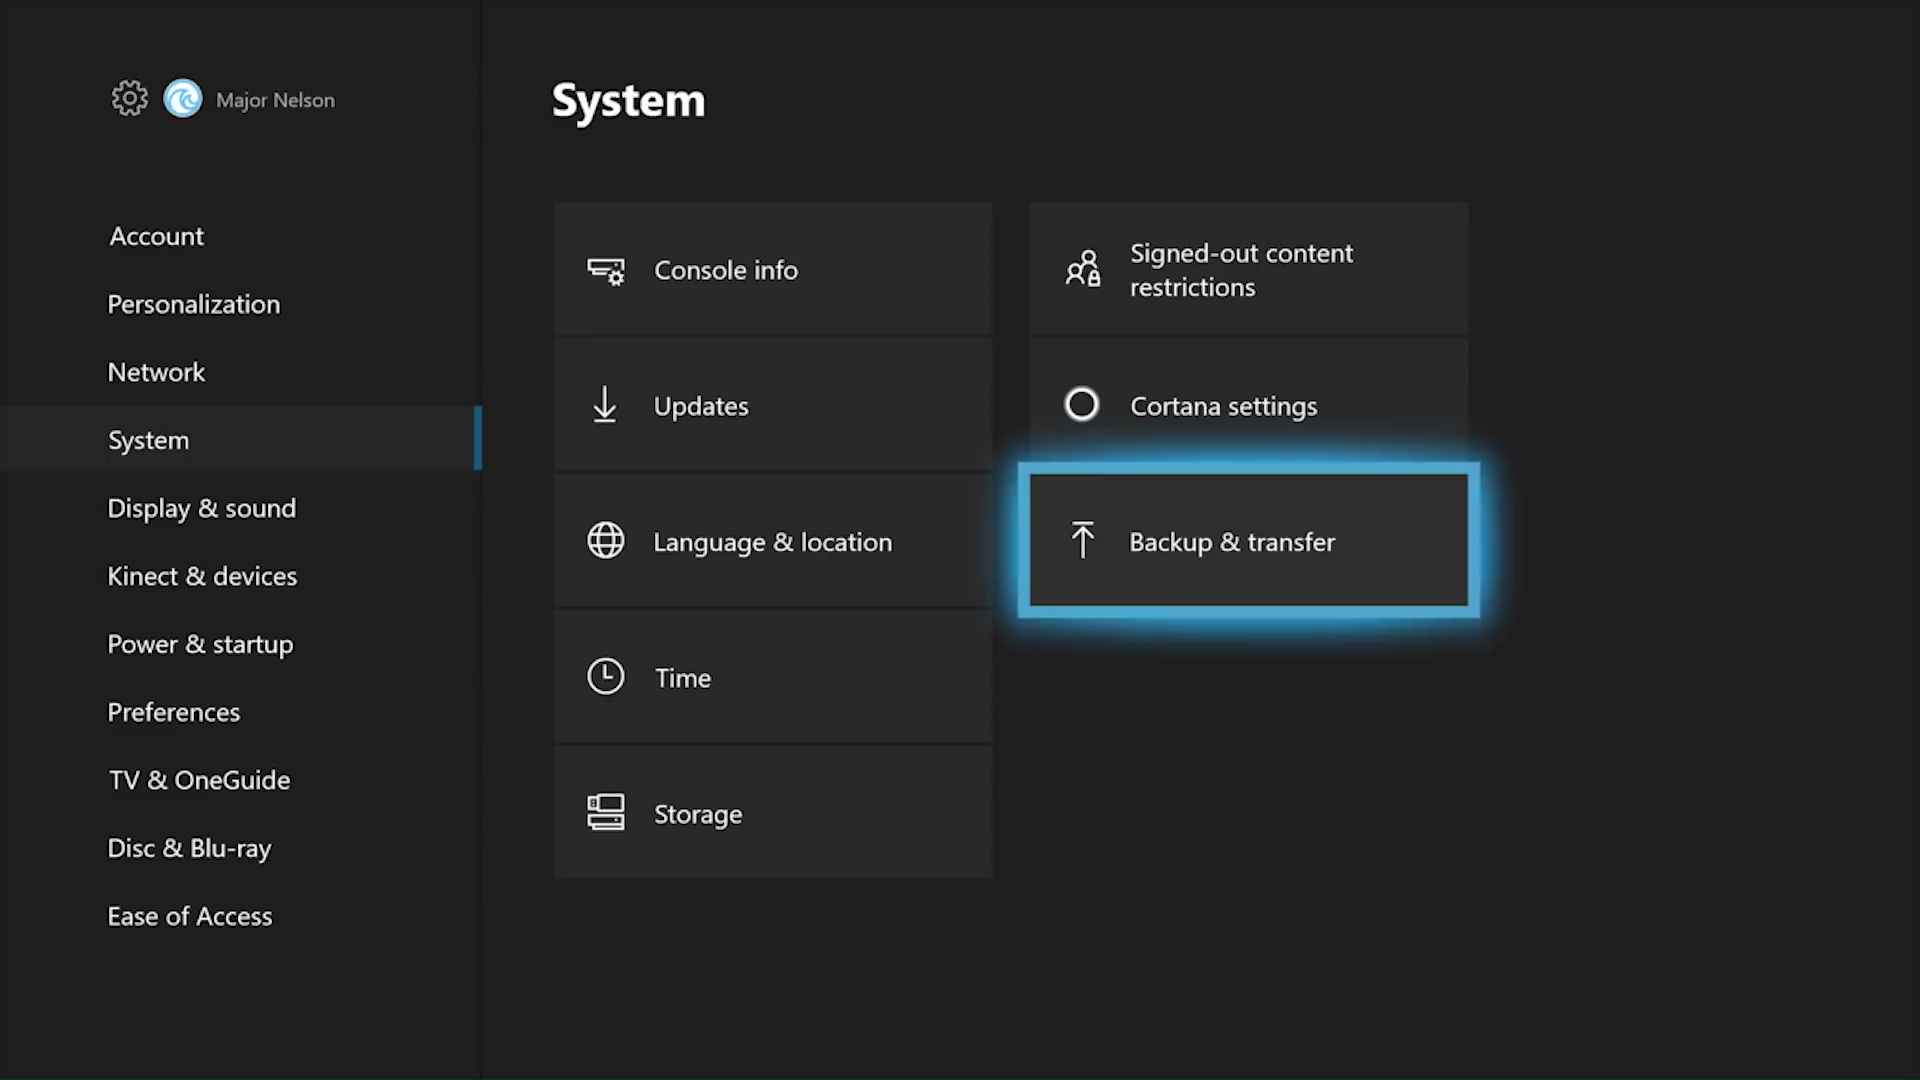
- Scroll down and select 'Settings'
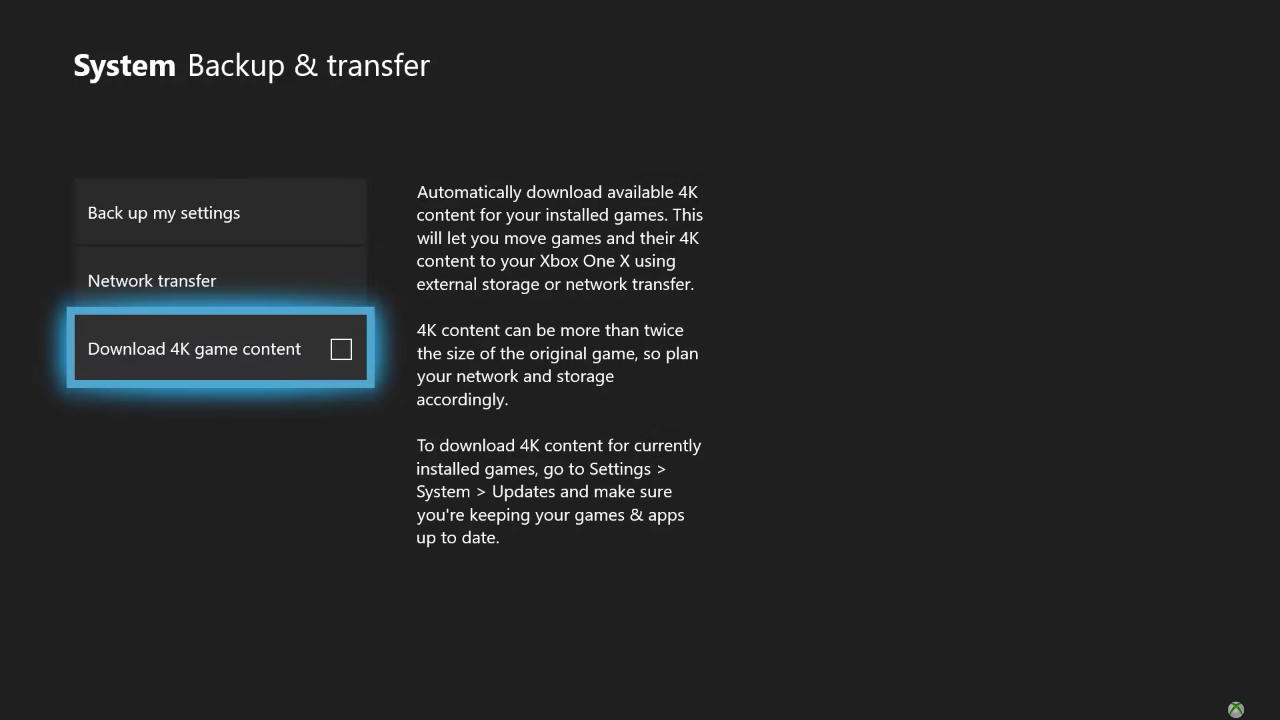
- From there, select 'Organization' and then 'Backup and Transfer'
- You lot'll see an pick to 'Download 4K game content' - select this to tick the box
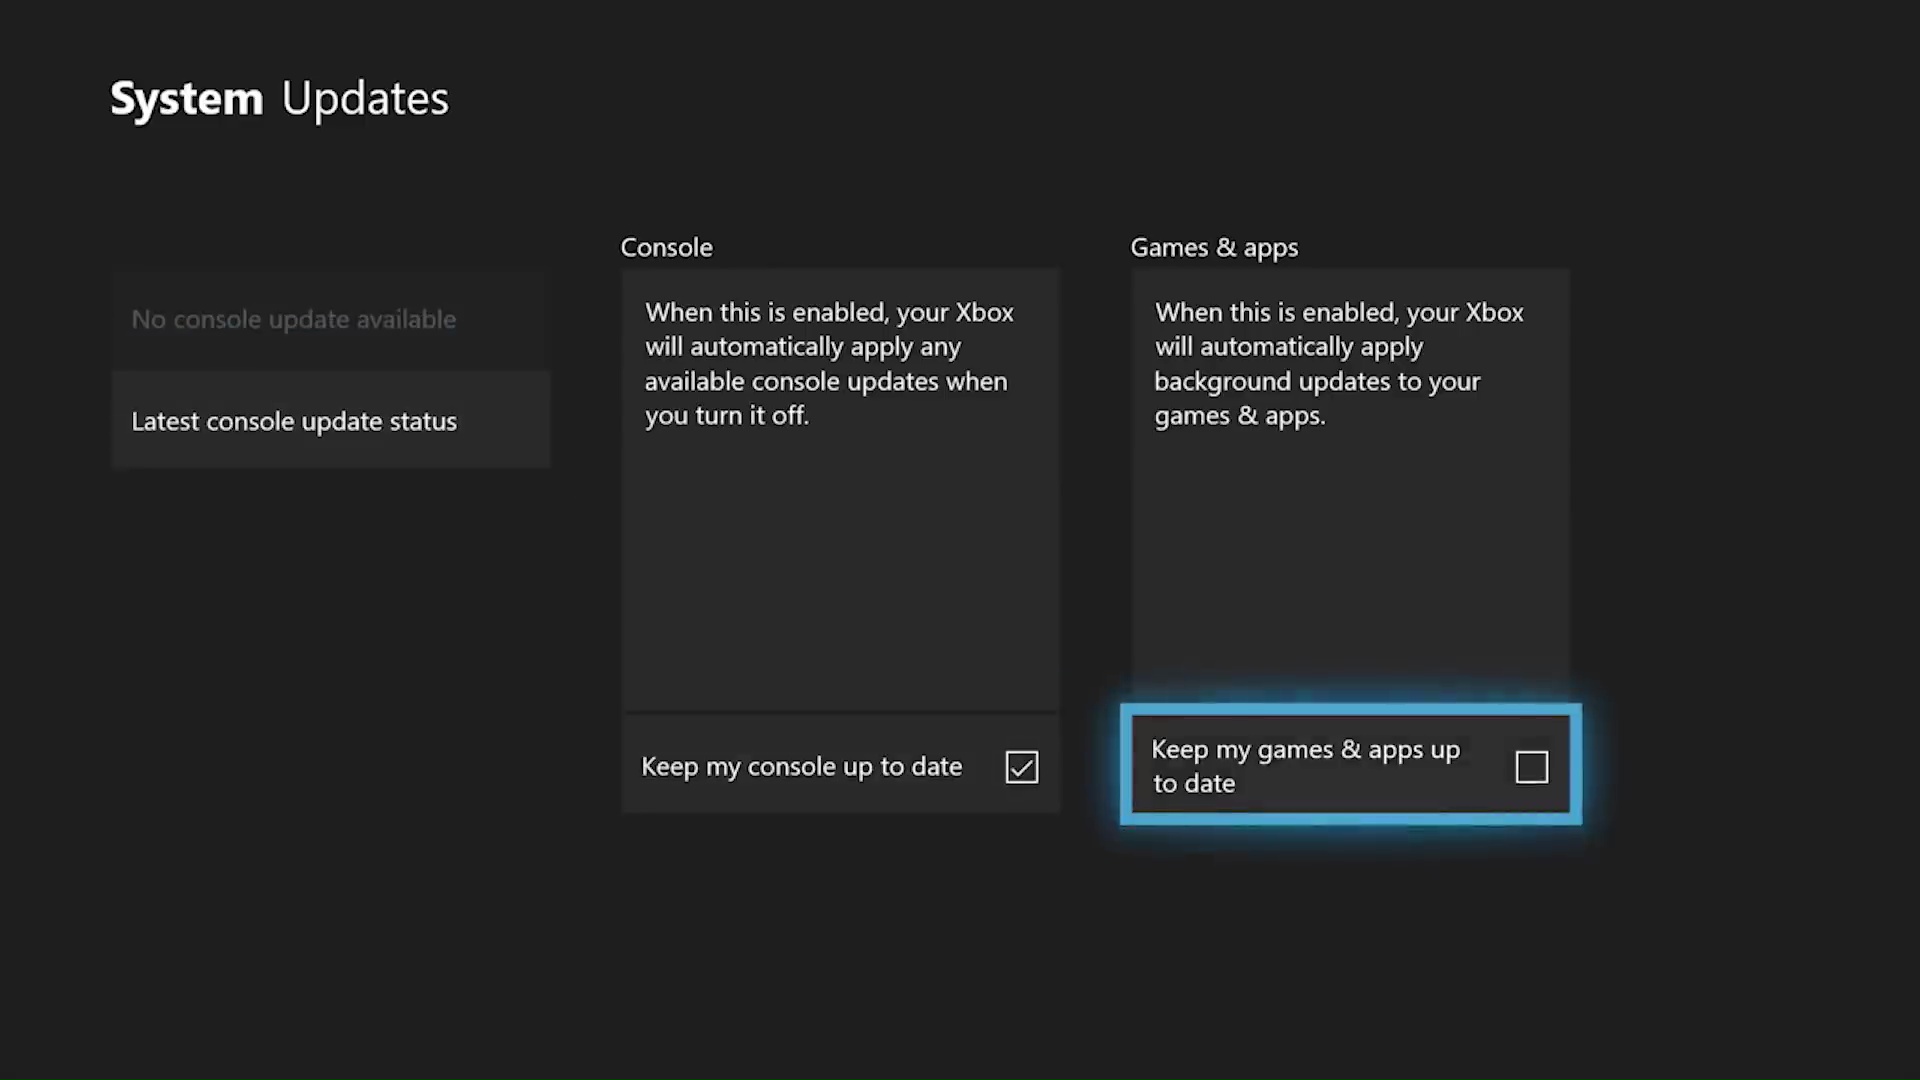
- With that box ticked, jump out of this card and head back to the 'Organisation' carte du jour where you'll select 'Updates'
- From this menu, tick the box that says 'Go along my games and apps up to engagement'
If the process has worked so you'll be able to see the patches downloading in the 'Updates' section of the 'Games and Apps' carte. After this point you can filter past 'Xbox One 10 enhanced' at the top of the list of your games to run into which games have received enhancements.
If you're finding that the patches aren't downloading then one of two things might accept happened. Firstly, a game might not accept received an Xbox One X patch, and so bank check Microsoft's list to meet if it's missing.
Secondly, these patches might not exist downloading because you don't have enough gratuitous infinite on your console to shop them. Unfortunately this means you lot're going to have to exercise a bit of a clear out, since the new console doesn't take a larger hard drive. It might fifty-fifty take a smaller 1 if you currently have an Xbox One S with 2TB's of storage.
It'south worth noting that even if you don't download the patches onto your old console, transferring game information will however save you lot time, as the new hardware will then only take to download the new assets rather than the unabridged game.
Step 2: Transferring your data
Past at present you'll either have an old Xbox One with a number of games installed with their Xbox One Ten patches waiting in the wings, or you'll have an old Xbox 1 with only your old games on it.
When your new panel arrives it'due south time to actually become them transferred. Yous accept two options here: you can either transfer the data using an external hard drive, or you tin transfer information technology over your home network.
We've outlined both methods below, along with the pros and cons for each.
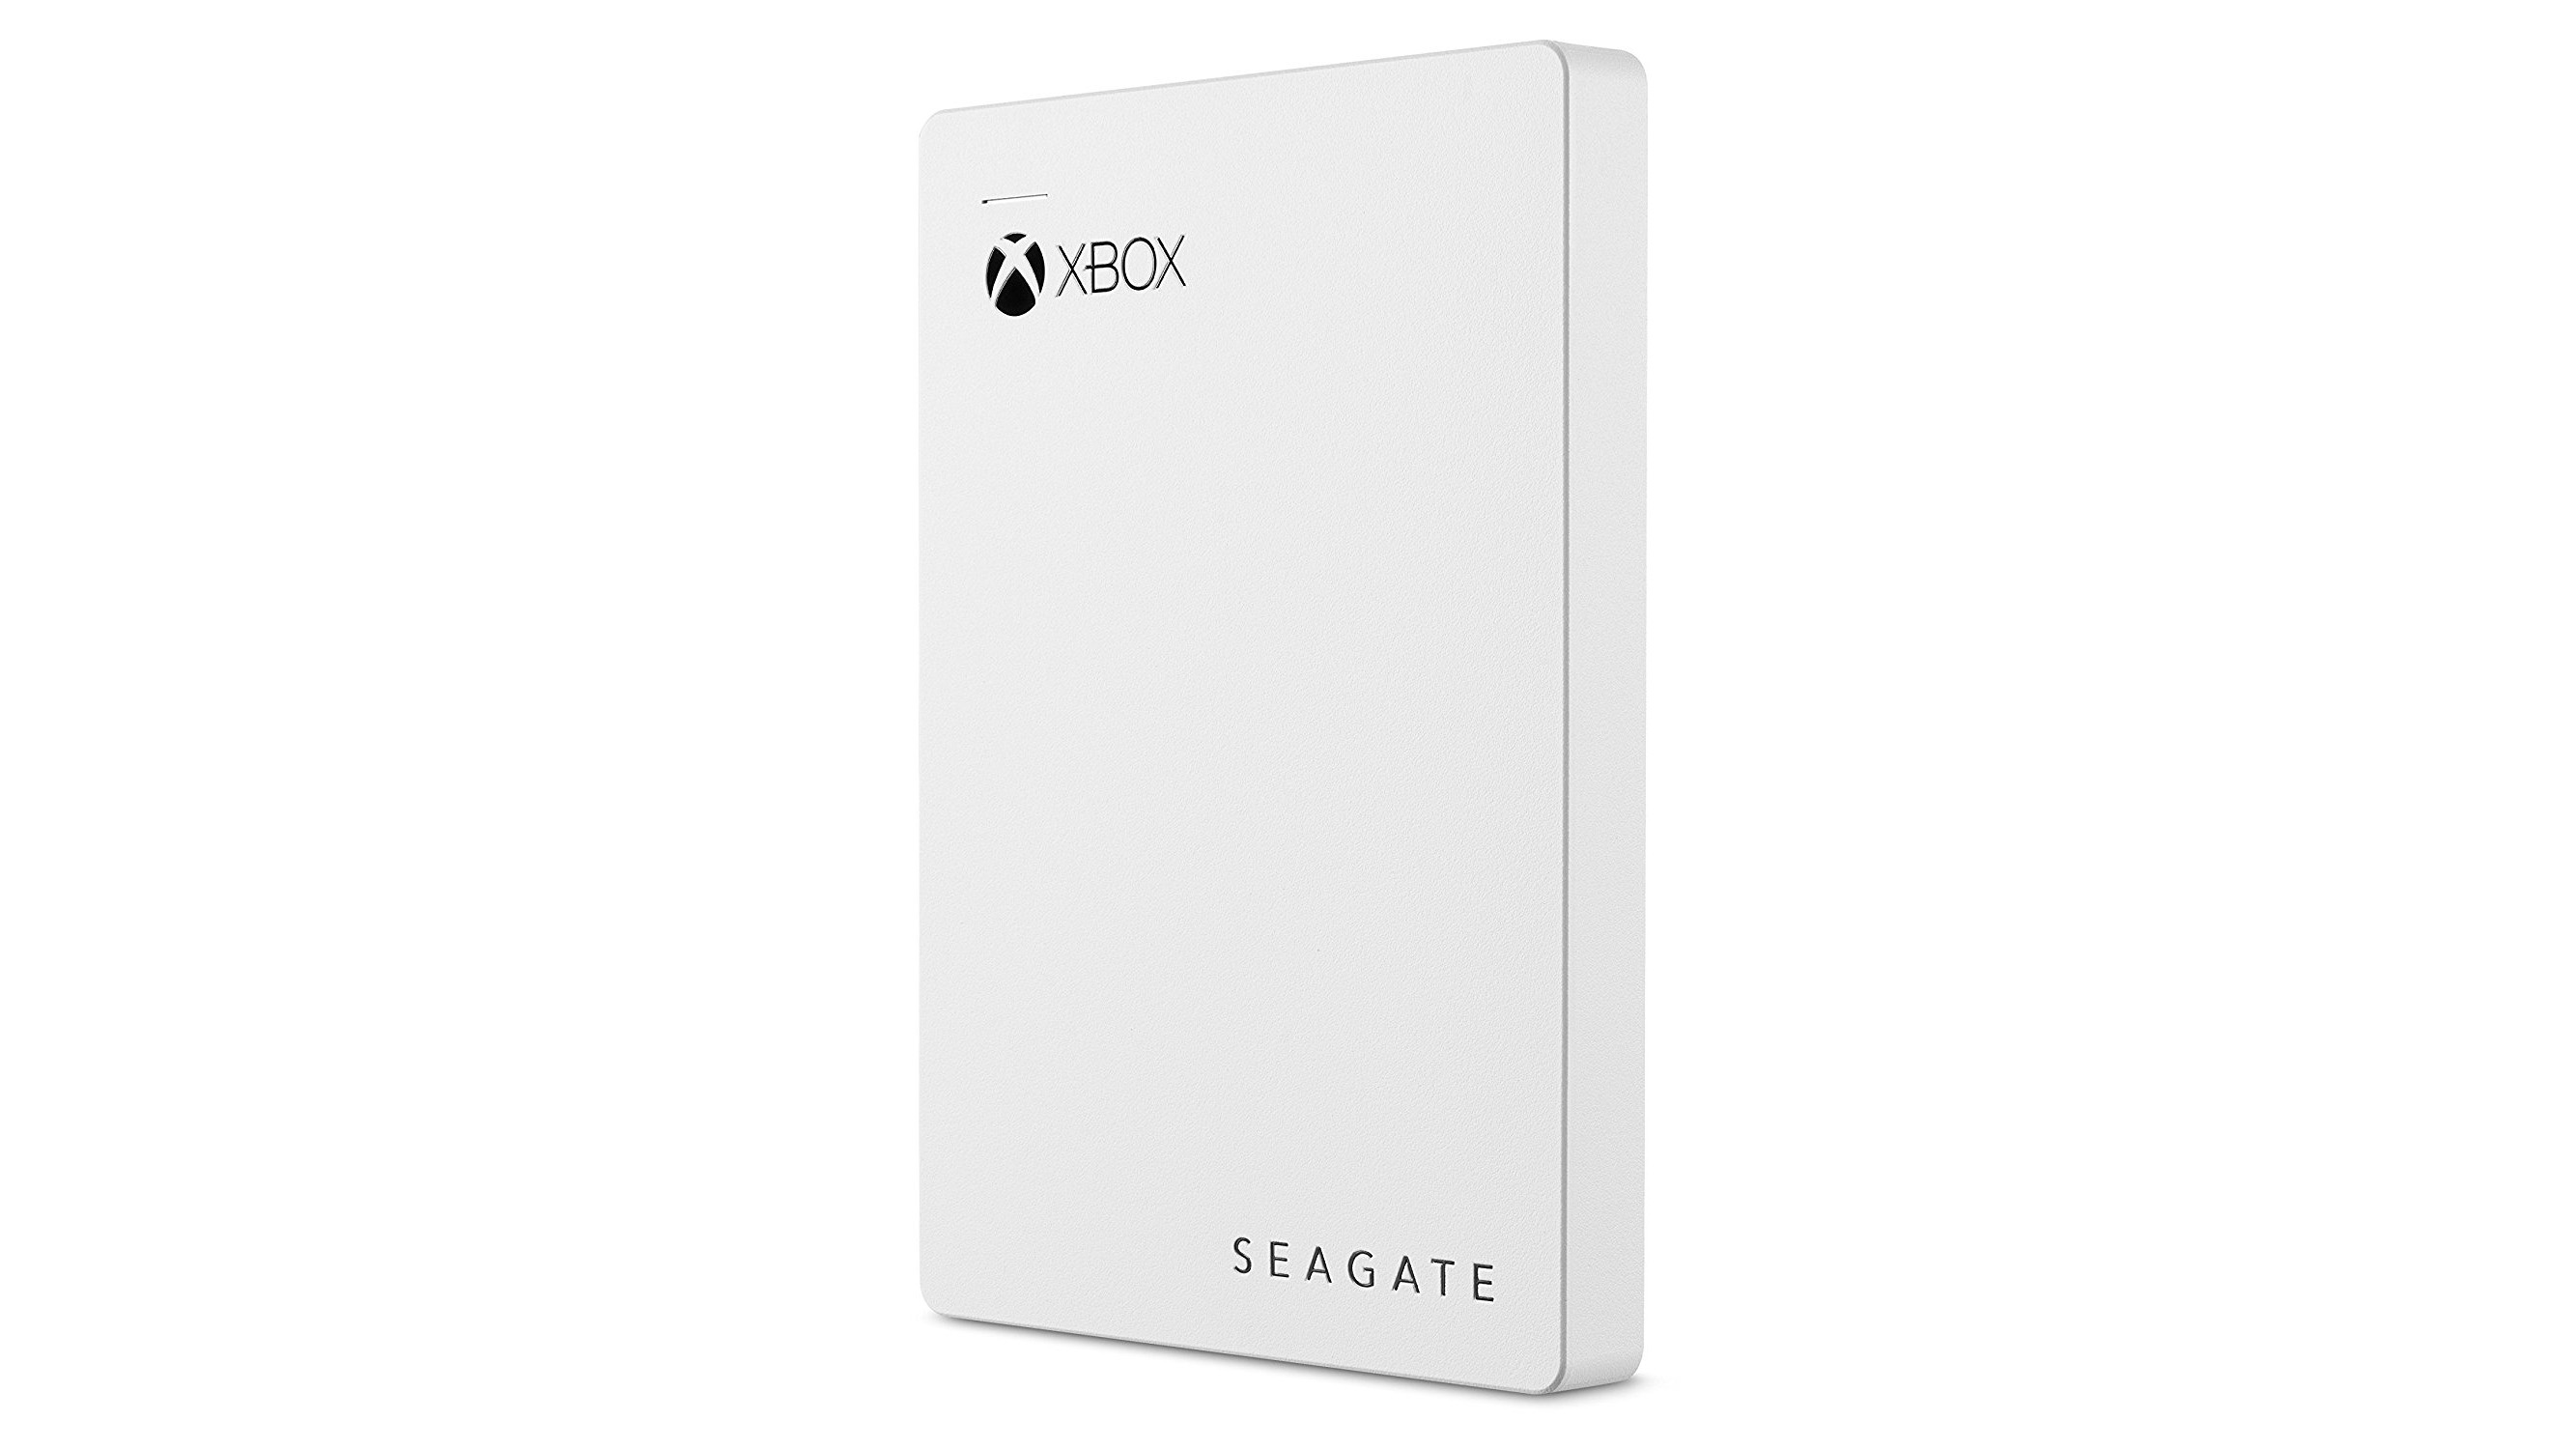
Step 2a: Transferring your data using an external hard drive
Pros: Not reliant on speed of your network
Cons: Requires external hard drive (sold separately)
The first step if you're using an external hard bulldoze is to fill-in all your data to information technology from your onetime console. Plug the external hard drive into a spare USB port, and confirm that you're happy for the panel to format it (note: this will erase everything previously stored on the hard drive).
Side by side, become to 'Settings' then 'System', and finally select 'Storage'. You should come across your difficult bulldoze right there, but if you don't then you lot tin troubleshoot what's happened using the instructions on Microsoft's site.
Click 'Internal', then 'Transfer', and select which games yous want to fill-in, or just 'Select All' if y'all want to bring everything over (though mind the 1TB limit of the new console).
Finally, press 'Copy selected' to transfer them to the hard drive that y'all have plugged in. Y'all could besides select 'Move selected' to delete them off your onetime panel in the procedure, simply we'd recommend playing it safe until they're stored on the new system.

At present we'll need to backup your console's chief settings. Hop back to the Home screen so proceed through the following menus: 'Settings', 'System', 'Backup and Transfer', then select 'Dorsum up to device'.
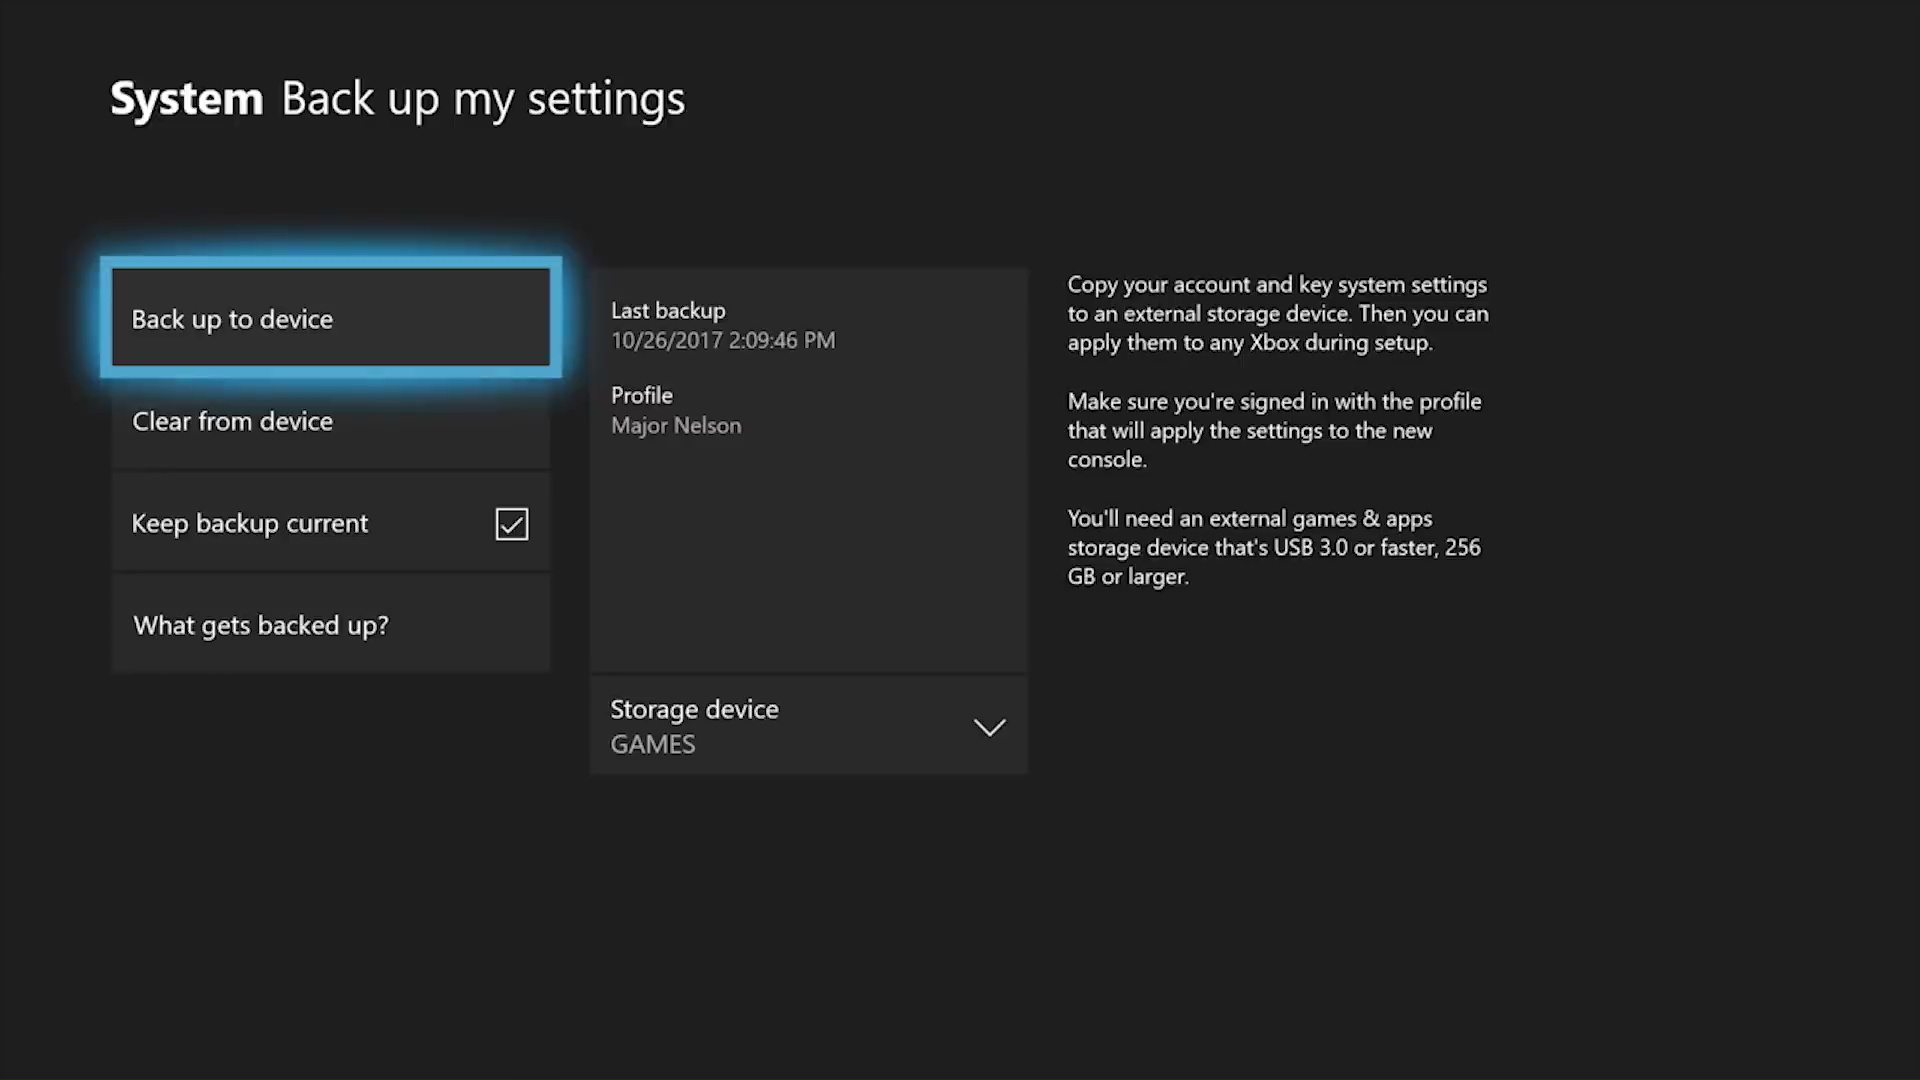
You should now have a difficult bulldoze filled with all your settings and games, exist careful with it!
Shut down your old console, and unplug it from your Television receiver setup. If y'all're switching from an Xbox One S to the X and then yous tin can actually leave all the accessories in place equally they'll work with your new machine. Only plug in the same HDMI cable and ability lead as earlier.
Notwithstanding, if you're moving from an original Xbox One then you'll need to bandy out the power brick as the new machine no longer needs information technology. Get all those old cables untangled and removed and plug in your new organization to both the mains and the back of your Goggle box using the HDMI cable included with the panel, being sure to selection an HDMI port that's 4K enabled (that is, if you lot're using a 4K Idiot box - check with your TV's manufacturer to see which ports are set for the new resolution).
Before you plough on the new console, plug the difficult drive with all your data into a free USB port.
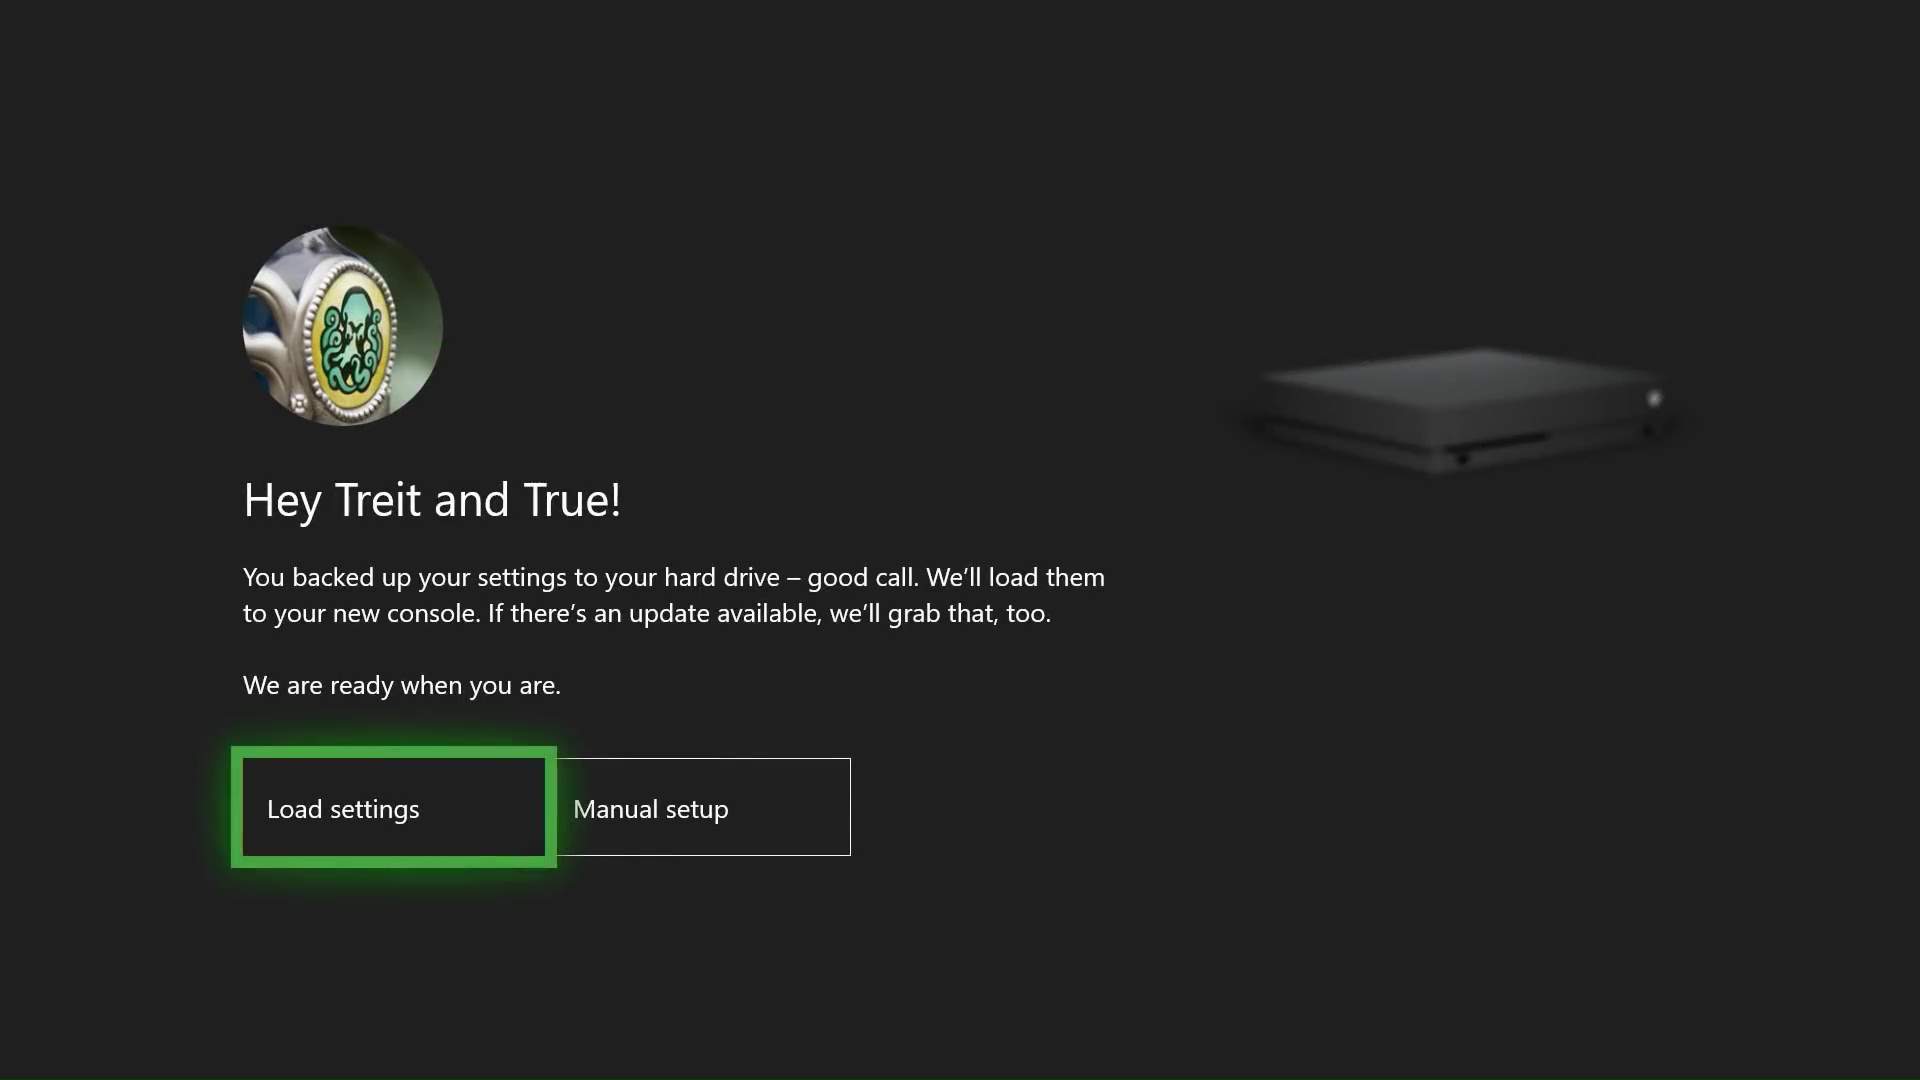
At present, turn on the new console, and information technology will automatically recognise the difficult bulldoze with all the backed up goodness on it. Select 'Load settings' to let information technology do its thing, and it'll import everything onto your new auto.
Once all your games are installed yous're ready to move on to Step iii.
Stride 2b: Transferring all your data over a local network
Pros: No external hard bulldoze required
Cons: Relies on both consoles being powered on at once. Could be hampered by a slow home network
Alternatively, if you don't have access to an external hard drive and so you can besides transfer your information over your home network. You'll need to leave both consoles turned on and plugged in for this transfer to work, and we'd also recommend having them both hard-wired into your router to maximise speeds and minimise any possible interference.
You should accept finished Footstep 1 of this guide with an former Xbox Ane filled with all the data you want to transfer to your new system.
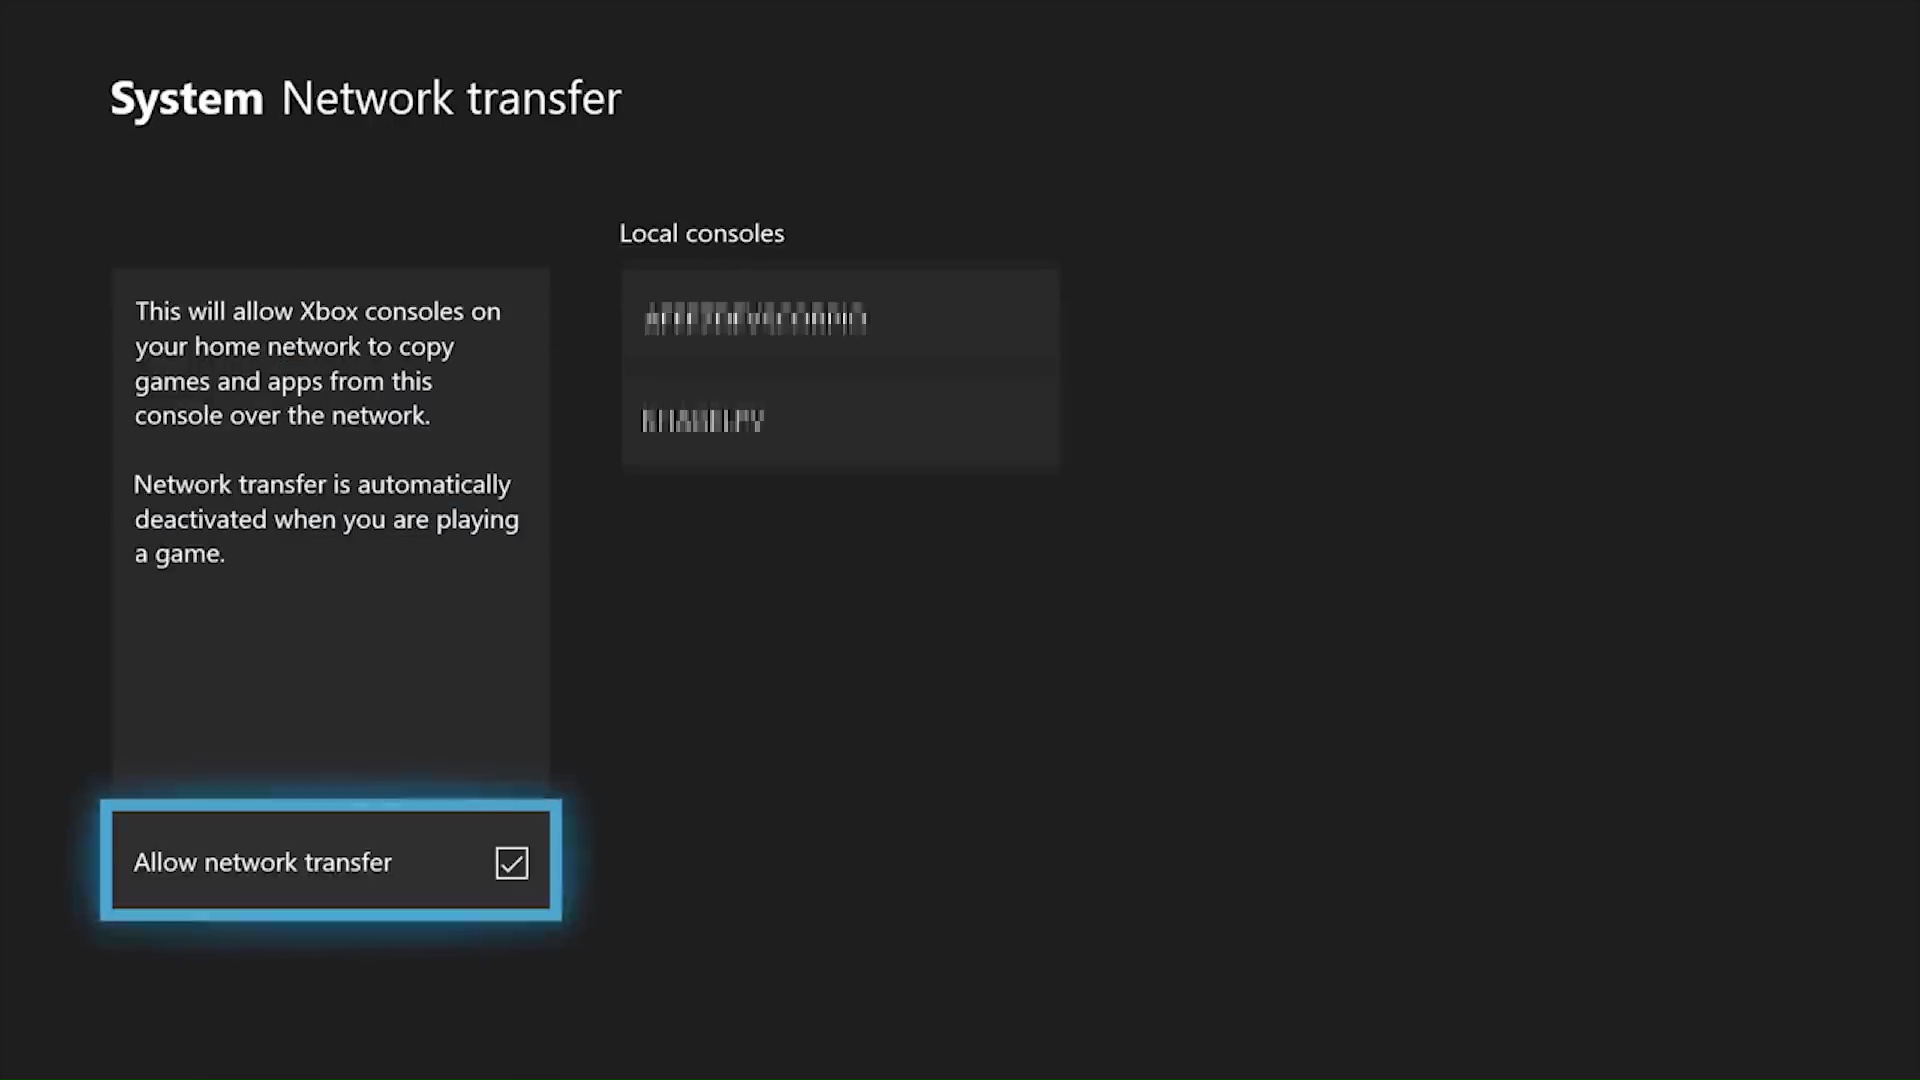
Don't plow it off on unplug it merely yet! From the Xbox guide (accessed by pressing the central Xbox button), select 'Settings' then 'System' then 'Backup and transfer'. From this card, select the 'Network transfer' selection, and tick the box next to the option that says 'Allow network transfer'.
Next, plug in your new console. If y'all're using a 4K TV then use the HDMI cablevision to plug it into a 4K capable HDMI port on the back of your TV (check with your Telly's manufacturer if you're unsure). If y'all're using a Full HD Tv then experience free to plug it into any spare HDMI port.
Power it on and go through the initial setup process, including logging into your Xbox Alive account. And then head into the same 'Backup and transfer' menu outlined above. If yous've gear up your previous console correctly then you should see it listed underneath the 'Local consoles' heading on the right of your screen.
Select your old Xbox 1, and yous'll now be presented with all the content saved on that device. You can either select private titles and information to transfer over, or else you tin tick the box next to 'Select all' to...well...select it all.
One time there'due south a tick mark next to everything you want to transfer over you can start the copying procedure past selecting 'Copy selected'.
Depending on the amount of content you've selected this process might take a little bit of time, during which you'll have to ensure both consoles are kept on. However, it should withal be much quicker than downloading the content from Microsoft'south servers. If your internet provider caps your internet usage then you tin be balance bodacious that the process won't have upward any of your allowance as it's all being done locally.
You can keep upwards with the transfer progress by jumping into the download queue. The entries that are transferring from your former system volition look a lot similar games that are downloading from the internet, just the words 'Local network transfer' volition indicate to you that they're being transferred locally.
Once all your games are installed y'all're ready to movement on to Step 3.
Stride 2c: Connecting an Xbox Ane X without transferring from an old system
Of course, your Xbox I X might be your first foray into the Xbox One ecosystem. If that'due south the case then you don't need to worry about messing around with transferring your old games.
However, when plugging in your new system yous need to brand sure you lot're plugging it into the correct port if you're connecting it to a 4K TV.
The commencement matter to consider is that you lot'll need to ensure yous're plugging your console into an HDMI port on your TV that supports 4K content at 60fps.
For this, the port volition need to be an HDMI ii.0 port. If you're not sure which of your HDMI ports support this new standard then you should check your manual, merely generally if you lot stick to your commencement couple of HDMI ports and then y'all should be ok.
However, if you're plugging your console into a Full Hard disk drive (ie 1080p screen) then you don't need to worry about HDMI versions.
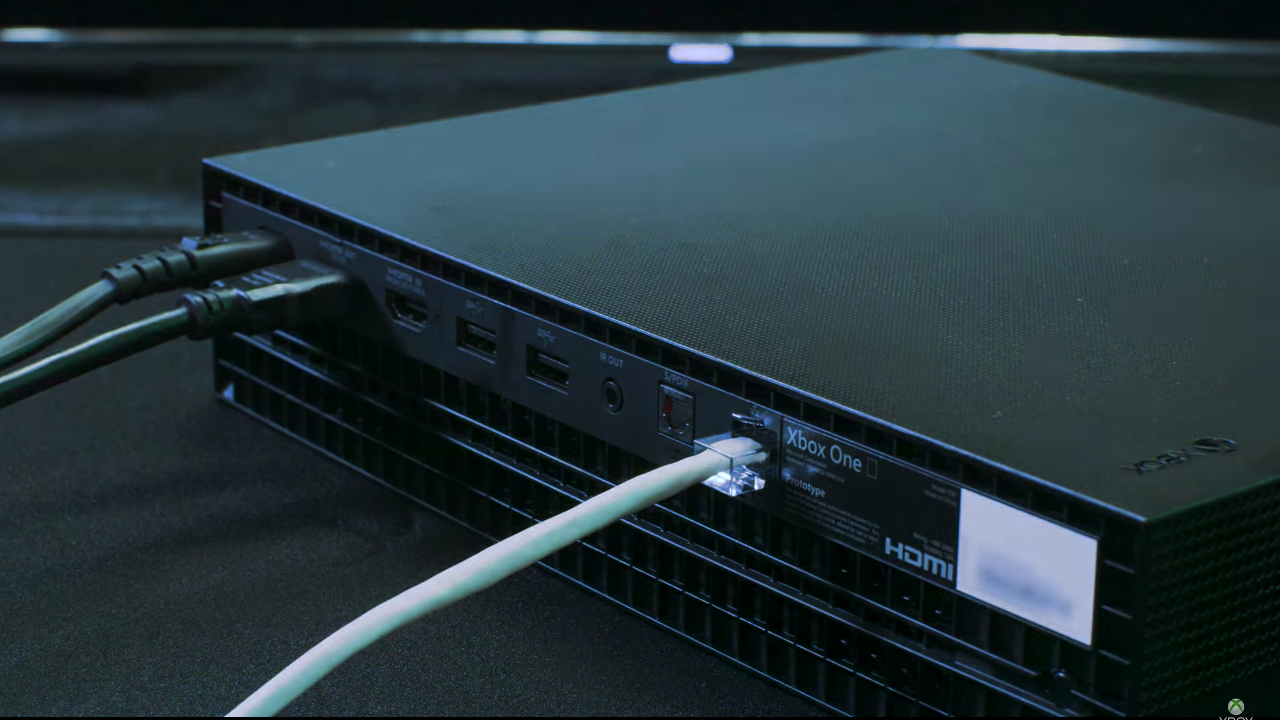
In either example you'll as well need to ensure that you use the HDMI port that's correct next to the console'south power input. Looking at the rear of the console it's the HDMI port that's on the left.
The only other connectedness you'll accept to plug in is the ability cable. Insert the 1 supplied in the console's box into the back of the automobile, and then attach it to an appropriate plug socket.
Depending on your audio setup you might have to use the S/PDIF Optical Audio out port to connect the console to an external set of speakers, only for the vast majority of people, two cables will suffice.
With the console plugged in, press the minor Xbox logo on its front to turn it on, and printing the Xbox logo in the center of the controller to connect it. You'll need to either create or log into an Xbox Alive business relationship the first time you kick up the console, but well-nigh of the steps hither are self explanatory.
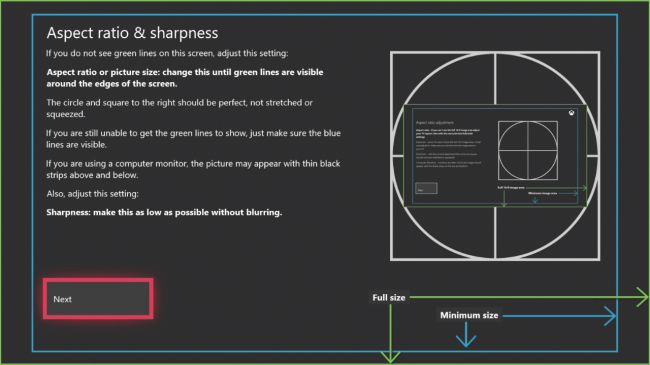
Step 3: Calibrate your Boob tube for the Xbox One X
By now you lot should have your console powered on and continued to your Goggle box, and if y'all've owned an Xbox Ane previously then it should be packed total of games for you to play.
Just there's ane more thing you should practise if you want to get the nearly out of this console, and that's calibrate your Telly to get the best picture performance. This is particularly if you're using a 4K TV where there can be a big driblet in image quality if information technology's non set properly.
Leap into the 'Display and Audio' section of the 'Settings' menu on the console and select the option to calibrate your TV.
What the Xbox Ane 10 will do hither is show you a number of images which volition and then allow you to calibrate your TV using the latter's own picture settings.
These steps are pretty well explained and then we won't echo them here, and at any charge per unit every TV will be unlike to calibrate and it would be incommunicable to outline all the unlike bill of fare options here.
We merely want to give two pieces of advice before you calibrate your display. The first is that if your TV has a 'Game Style' pick, then you lot should plough information technology on before you get through the calibration steps.
Game mode is an choice that minimizes input lag by turning off some of the picture processing. This tin can make the picture appear slightly worse, but ultimately makes games experience more than responsive - definitely a compromise worth making.
Secondly is that, if your Telly allows information technology, you should try and just change these settings for the Xbox One 10. This volition hateful that your existing setup for other Blu-ray players or set up-height boxes won't be affected past the specific needs of the console.
If yous have the option of only setting 'Game Mode' for your Xbox Ane X's HDMI input and so do and then; y'all don't want the negative impact of the mode on moving-picture show quality to exist felt across your other external devices.
One time y'all've gone through this calibration process then your console should be set up to look its absolute best.
It sounds like a very involved process, but we had our console upwardly and running in around a half hour, after which bespeak you'll never have to touch any of these settings once again.
We've tried to include as much information as possible in this guide, but if in that location are whatever areas that you lot experience could be made clearer so delight go far contact with u.s. via email or else on Twitter.
Bonus: Use a DNS service to meliorate streaming speeds
You tin also use an external service to alter your DNS settings and heighten your Xbox One Ten's streaming capabilities. ExpressVPN 'southward MediaStreamer, for instance, lets users admission content from anywhere in the world while simultaneously boosting their online speeds.
Considering MediaStreamer removes whatever and all geographic content blocks, gamers tin can access pop streaming sites like Netflix and Hulu no matter where they are. What's more, MediaStreamer also minimizes speed loss by decreasing load and ping times between different networks. In fact, some gamers notice pregnant upticks in their connections.
That said, while a DNS service like MediaStreamer may exist easier to install, it doesn't offering the same encryption benefits of a traditional VPN (Virtual Individual Network). In social club to take reward of VPN protection on your Xbox, you'll need to connect to one via your router.
- If y'all're looking for a new Television receiver for your Xbox One X, these are the best TVs for gaming
- Here are the best Xbox Ane Ten bundles

How To Set Up New Xbox Account,
Source: https://www.techradar.com/how-to/how-to-set-up-the-xbox-one-x-and-transfer-all-your-old-games-and-data
Posted by: mcdanielwithomy.blogspot.com
0 Response to "How To Set Up New Xbox Account"
Post a Comment